To give an old sweatshirt a street-style design with holes, you'll need tools like scissors, sandpaper, and a seam ripper. Begin by planning where to place the distressing, focusing on natural wear points like the collar, cuffs, hem, and elbows. Use scissors to make small initial snips, then use a seam ripper or tweezers to pull at the horizontal threads, creating a more authentic, frayed hole. For a worn-in texture, vigorously rub sandpaper over the edges of the holes and other areas to create pilling and a softer, vintage feel.

Table of Contents
- Why Distressed Aesthetics Rule Streetwear
- Assembling Your Toolkit: The Essentials for Destruction
- Selecting the Perfect Canvas: Choosing Your Sweatshirt
- The Art of Destruction: A Step-by-Step Process
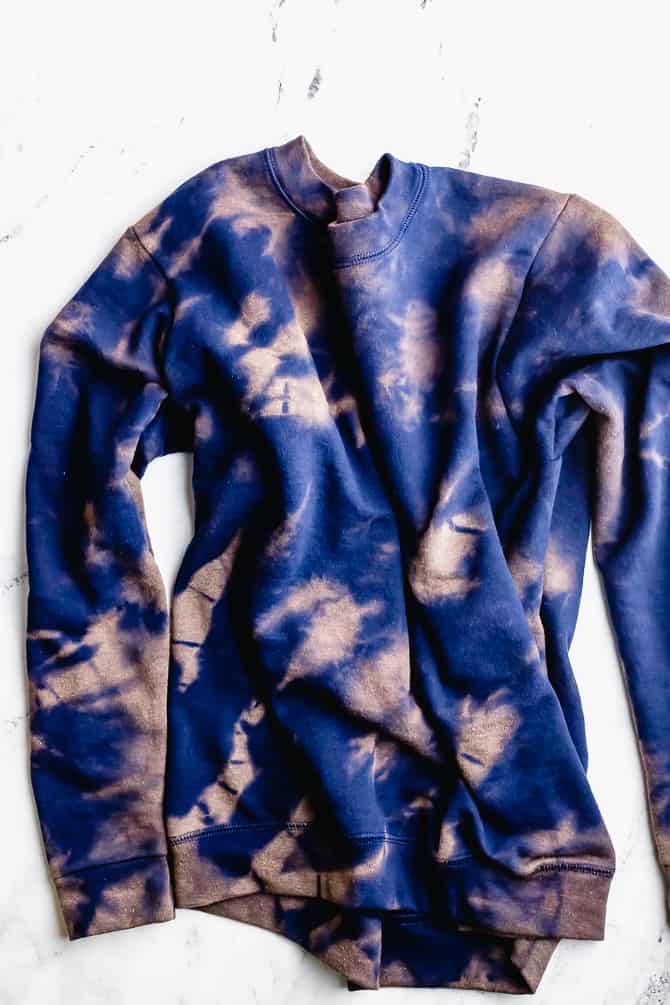
- Advanced Customization: Sun-Faded Effects with Bleach
- Post-Creation Care: How to Wash Your Distressed Garment
- From Haul to High Fashion: The CNFans Spreadsheet Edge
- Styling Your Custom Creation: Putting It All Together
Why Distressed Aesthetics Rule Streetwear
What makes a ripped, torn, and faded sweatshirt more desirable than a pristine one? The answer lies in character and narrative. In the world of high fashion and streetwear, distressing is a deliberate art form. It transforms a mass-produced garment into a unique, one-of-a-kind piece that tells a story. This aesthetic pushes back against perfection, embracing a lived-in, rebellious spirit. Brands like Balenciaga, Fear of God, and Vetements have built entire collections around garments that look like they've survived decades of wear, selling them for premium prices.
Creating your own distressed sweatshirt allows you to tap into this high-fashion concept without the designer price tag. It's an act of personalization that imbues the item with your own creative intent. A strategically placed hole or a perfectly frayed cuff is a mark of individuality. It suggests the piece is a cherished "grail" that has been worn and loved, rather than a brand-new item straight off the rack. This sense of history, whether real or fabricated, is a cornerstone of modern street style.
Assembling Your Toolkit: The Essentials for Destruction
Before you begin your project, gathering the right tools is crucial. Using the wrong implements can lead to sloppy cuts and an unnatural look. The goal is controlled chaos, not a complete mess. Having these items on hand will ensure you have precision and flexibility as you work.
Each tool serves a specific purpose in mimicking years of natural wear and tear. A sharp pair of fabric scissors is for clean initial cuts, while a seam ripper is the secret to creating authentic frays. Sandpaper is your best friend for aging the fabric itself, softening edges and creating a vintage patina. Here is a breakdown of what you need:
| Tool | Purpose | Pro-Tip |
|---|---|---|
| Fabric Scissors | Making clean, precise initial cuts. | Do not use kitchen or paper scissors; they will chew the fabric. |
| Seam Ripper or Tweezers | Pulling individual threads to create natural-looking frays around holes. | The seam ripper is faster for pulling threads in a line. |
| Sandpaper (80-120 grit) | Abrading fabric to create a soft, worn texture and fraying edges. | Wrap it around a block of wood for better grip and even pressure. |
| Tailor's Chalk or a Pencil | Marking the areas you plan to distress. | Chalk is ideal as it brushes off easily after you're done. |
| Cardboard or a Cutting Mat | Placing inside the sweatshirt to prevent cutting through to the other side. | An old magazine or thick piece of cardboard works perfectly. |
Selecting the Perfect Canvas: Choosing Your Sweatshirt
The success of your project heavily depends on the sweatshirt you choose. Not all fabrics distress equally. The ideal choice is a sweatshirt made of 100% cotton or a high-cotton blend. Cotton fibers break down and fray beautifully, creating the soft, authentic look you want. Synthetic materials like polyester do not fray well and can sometimes melt or look messy when cut.
Consider the weight and fit. A heavier, more substantial sweatshirt will hold up better to distressing and provide a more satisfying canvas to work on. An oversized or boxy fit often works best for this style, as it drapes in a way that accentuates the distressing and aligns with current streetwear trends. That perfect blank you sourced from your latest haul is an ideal candidate. Color is also a factor; darker colors like black, charcoal, or navy provide a stark contrast for distressing, while lighter colors can yield a more subtle, sun-bleached result.
The Art of Destruction: A Step-by-Step Process
With your sweatshirt and tools ready, it's time to begin the creative process. Remember to work slowly and methodically. It's always possible to add more distressing, but you can't undo a cut that's too large or misplaced. Place the cardboard inside the sweatshirt to isolate the area you're working on.
Mapping Your Vision: Plan Before You Cut
Where should you make holes? Think about where a garment would naturally wear out over time. Key areas include the collar ribbing, sleeve cuffs, bottom hem, elbows, and around the pocket edges (if it has one). Lay the sweatshirt flat and use your tailor's chalk to mark the spots you want to target. You can make small circles for holes, lines for rips, or shaded areas for general abrasion.
Look up inspiration images of vintage sweatshirts or designer pieces to guide your placement. Do you want a few subtle holes or a heavily "thrashed" look? A common mistake is to place holes symmetrically or in unnatural locations. Random, clustered distressing often looks more authentic. Try the sweatshirt on and see where it naturally folds and creases; these are also great spots for distressing.
Technique 1: Mastering Holes and Rips
For a small, round hole, pinch the fabric at your marked spot and make a tiny snip with your scissors. Then, use the seam ripper or tweezers to start pulling out the horizontal (weft) threads one by one. You will be left with just the vertical (warp) threads, creating a classic "ladder" effect. For a more organic-looking hole, pull some of the vertical threads out as well.
For a larger rip, make a horizontal cut with your scissors, about 1-2 inches long. Now, use your fingers to pull the fabric apart aggressively. This will cause the fabric to tear along its grain. Afterwards, use sandpaper on the edges of the rip to soften them and encourage more fraying. The key is to vary the size and shape of your holes to avoid a uniform, machine-made appearance.
Technique 2: Achieving the Perfect Fray on Edges
Frayed edges on the collar, cuffs, and hem are essential for a truly worn-in look. This is where your sandpaper or a seam ripper is most effective. For the cuffs, lay them flat and vigorously rub the edge with sandpaper until the fabric starts to break down and pill. You can also use the tip of your scissors to make tiny, closely-spaced snips along the very edge of the ribbing and then use sandpaper to fray them out.
The collar is another high-impact area. Focus your abrasion on the very top edge where it would rub against the neck. A few small cuts with a seam ripper along the ribbing can create the impression that the collar is starting to come apart after years of use. Don't overdo it; a little fraying here goes a long way.
Technique 3: Creating Texture with Abrasions
Beyond holes, general surface abrasion is what gives a sweatshirt its vintage character. This technique creates a faded, slightly pilled texture known as a patina. Lay the sweatshirt flat and identify areas that would see a lot of friction, such as the shoulders, back, and front torso. Take your sandpaper block and rub it across the surface of the fabric in different directions.
Apply firm pressure to create visible wear. You will notice the color lightening and the texture of the fabric becoming softer and fuzzier. This step is crucial for blending the distressed areas with the rest of the garment, making the holes and rips feel like a natural part of the sweatshirt's history rather than something you just added.
Advanced Customization: Sun-Faded Effects with Bleach
For those looking to take their customization a step further, a subtle bleach application can mimic years of sun exposure. Safety first: always work in a well-ventilated area and wear gloves and eye protection when handling bleach. You are not trying to tie-dye the sweatshirt, but rather to subtly lift the color in certain areas.
Mix a weak solution of one part bleach to ten parts water in a spray bottle. Lightly mist the areas that would naturally be hit by the sun: the shoulders, the top of the hood, and the upper chest. Spray from a distance of about 1-2 feet for a fine, even mist. Let it sit for only 5-10 minutes—the effect happens quickly. Immediately rinse the sweatshirt thoroughly in cold water to stop the chemical process, and then run it through a full wash cycle.
Post-Creation Care: How to Wash Your Distressed Garment
Now that you have created your masterpiece, you need to care for it properly to prevent it from completely disintegrating. The first wash after distressing is important—it will soften the edges of your cuts and make the frays look more natural. For all subsequent washes, it is highly recommended to either hand wash the sweatshirt or place it in a mesh laundry bag and wash it on a gentle, cold cycle.
Never put your distressed sweatshirt in the dryer on high heat. The tumbling action can aggressively enlarge holes and cause unwanted new tears. The best method is to lay it flat or hang it to air dry. This gentle approach will preserve your hard work and allow the garment to age gracefully over time.
From Haul to High Fashion: The CNFans Spreadsheet Edge
That perfect oversized blank sweatshirt you just scored in your latest haul is the ideal starting point for a DIY project. But managing the process of getting that piece—from finding it on Weidian or Taobao to getting it into your hands—can be a complex task involving multiple agents, shipping lines, and currency conversions. This is where the CNFans Spreadsheet becomes an indispensable tool for any serious haul builder.
Before you can even think about distressing your finds, you need to manage them effectively. The CNFans Spreadsheet simplifies this entire backend process. It helps you organize your orders, track parcels across different carriers, and calculate your true all-in costs with real-time shipping estimates and currency conversions. By streamlining the logistics of acquiring your garments, it frees you up to focus on the creative part: transforming your finds into one-of-a-kind statement pieces just like the one you've just learned how to make.
Styling Your Custom Creation: Putting It All Together
How do you wear your newly customized sweatshirt? The beauty of a distressed piece is its versatility. It can serve as the focal point of an outfit or a textural layering element. For a classic streetwear look, pair your oversized distressed sweatshirt with baggy denim jeans or cargo pants. The contrast between the soft, worn top and a more structured bottom creates a balanced silhouette.
Consider layering. Wear your sweatshirt over a longer t-shirt to have the tee peek out from under the frayed hem. Or, throw an open flannel or a bomber jacket over the top, allowing the distressed hood and cuffs to show. Complete the look with a pair of chunky sneakers and a beanie or cap. The key is confidence; you're not just wearing a sweatshirt, you're wearing a piece of your own design.